
We’re going to make a simple collage by cutting and pasting pieces of photos into a composite image.
Time: 60 minutes
IntroSteps

First download this ZIP with sourcefiles.
Preparation
- Unzip the ZIP to a logical place on your computer.
- Open Photoshop and choose File > Open
- Hold down CMD/CTRL and select all images
- Click open. The images now all open in separate tabs.
Pineapple
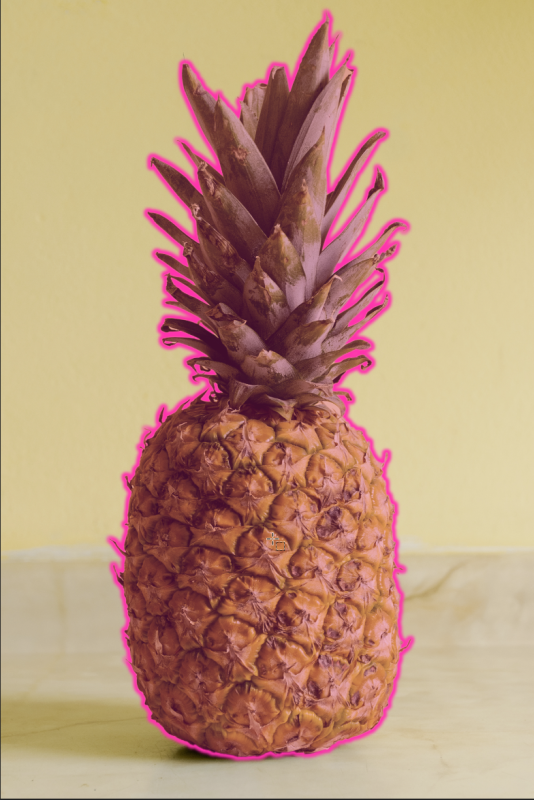
- Go to the image of the pineapple and select the “Object Selection Tool”.
- Hold your arrow above the pineapple. When you see it light up in a pink shade, click with the mouse.
- Choose CMD/CTRL-C (copy)
- Go to the image of the beach and choose CMD/CTRL-V (paste).
Lime
- Go to the image of the lime and repeat the procedure above.
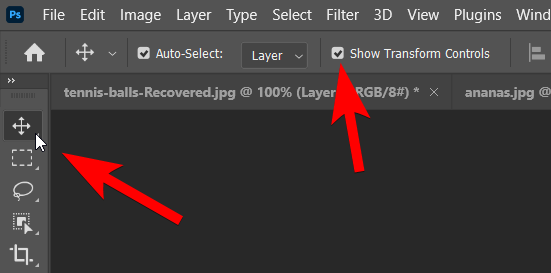
NOTE: when you paste the lime you will see that it is too big. - Select the “Move” tool.
- In the tool’s properties, check “Show Transform Controls”.
- Drag the anchor points to scale the image.
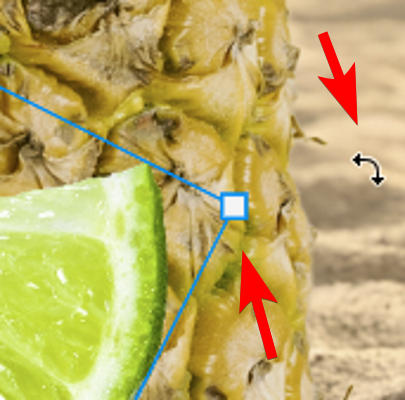
- When you place the cursor slightly outside a corner anchor point you will see the rotation symbol. Click and drag to rotate the lime.
Headphones
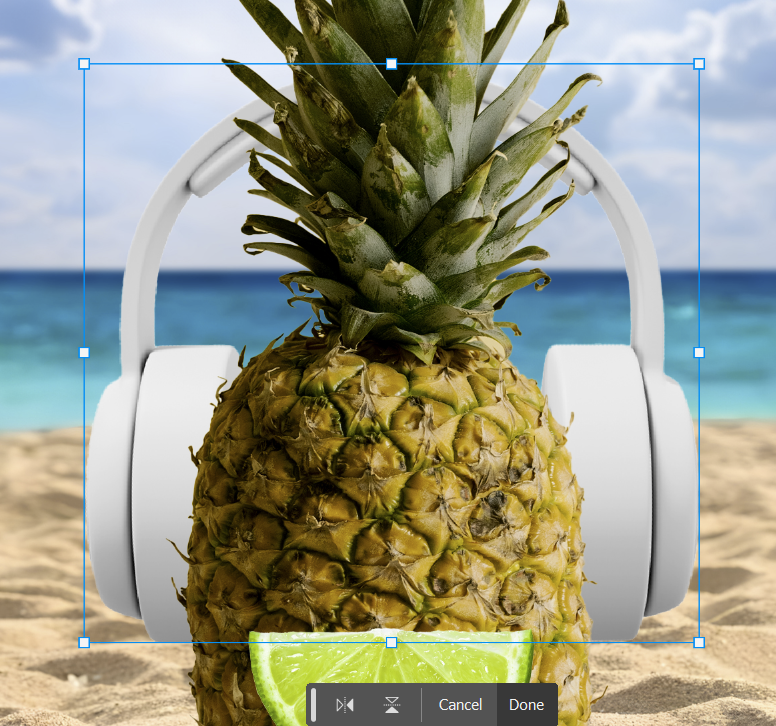
- Go to the image of the headphones and repeat the selection procedure with the “Object Selection Tool”.
- Move this layer down in the Layers panel so that it is underneath (behind) the pineapple.
- Use the Move Tool to make it a little bigger and move it in the right place so it looks like it’s on the pineapple.
Sunglasses Frame
Now it gets a little more complex. Here the Object Selection tool does not work properly. We therefore use the “Quick Selection” tool. You can set the size of this tool using the square brackets [ and ]. Zoom in carefully to view the edges, and edit this if necessary with the “Lasso” tool. For both tools, hold down Option/Alt to remove parts of the selection.
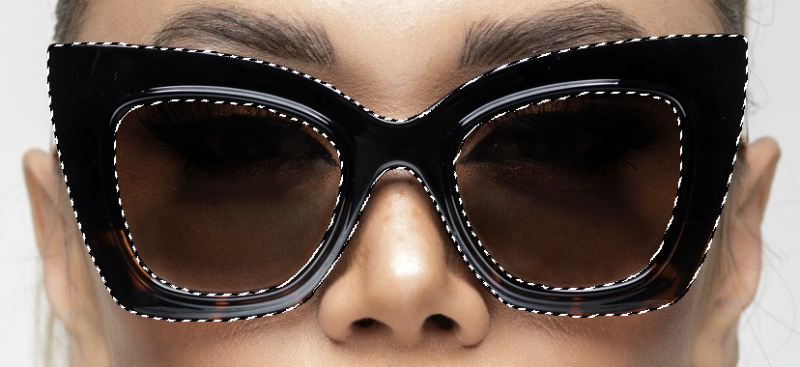
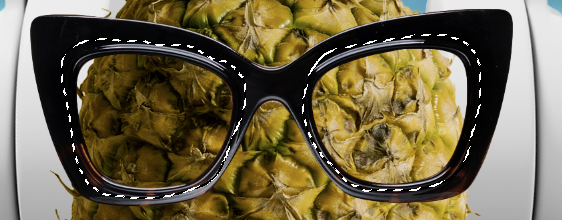
- Go to the image of the sunglasses and select the frame of the glasses without the lenses using the “Quick Selection” and “Lasso” tools.
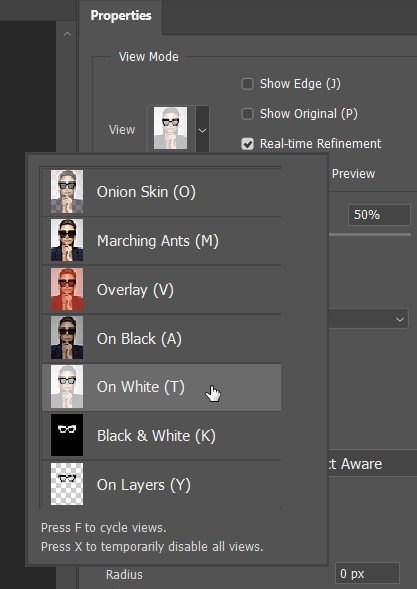
- When you have made a precise selection, click on the “Select and Mask” button at the top.
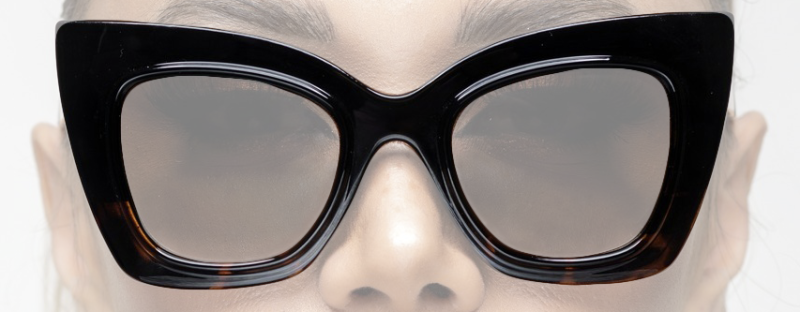
- Now set the View Mode on the right to “On White”. This gives you an impression of the current selection.
- Under Global Refinements, set Smooth to 100 and Contrast to 50.
If all goes well, you should now see nice, sleek glasses like in the picture below:
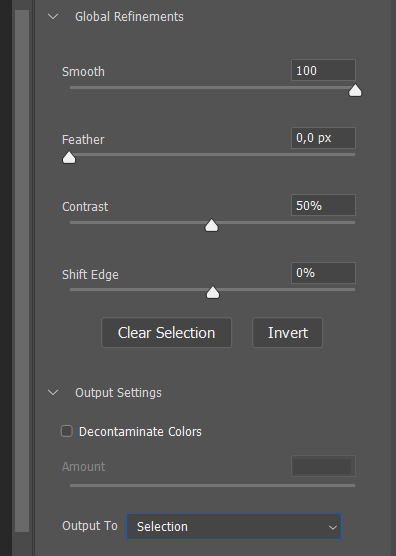
- Under Output Settings, set the Output to “Selection” and click OK. This closes the Select and Mask interface.
- Now choose CMD/CTRL-C (copy)
- Go to the beach tab and paste the glasses there.
- If necessary, move the layer above the pineapple layer.
Sunglasses lenses
- Use the “Lasso” tool to select the glasses with some extra margin.
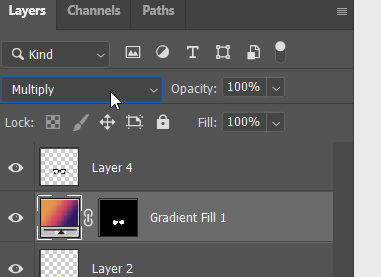
- Now choose Layer > New Fill Layer > Gradient, click OK and choose a nice Gradient from the list and click OK again.
- Now drag this layer below the glasses layer in the Layers panel.
- In the Layers panel, set the blend mode to Multiply.
- If you want, you can also make adjustments to the Opacity.
To hand in
- When you are happy with the result, choose File > Save As.
- Make sure you save as a Photoshop document (*.PSD)
- Submit the PSD.
