You’re going to create a simple booklet with styled headings and body text. This exercise is a basic guide, you can add more complexity and customization to the booklet by adding more pages, more images, and more style variations. You can experiment with different layouts, typography, color, and image manipulation options and explore other features and tools in Indesign.
Time: 90 minutes
Setup
- Open the .indd document you made for the exercise A Simple Brochure. Alternatively, use this document as a starting point.
- Open the Pages palette and double-click on page 3. This will select it.

- Now press the Create New Page button to add 4 pages. The last page should remain the last page, and two empty spreads should be placed before that.
- Choose File > Document Setup. Open Bleed & Slug and set the Bleed to 3 mm.
If you have graphics that run up to the page edge, make sure to extend these to the Bleed Margin.
Layout
- Create a layout for the spreads you just added. Use images and text frames. Make sure to have a full-page image on page 6.
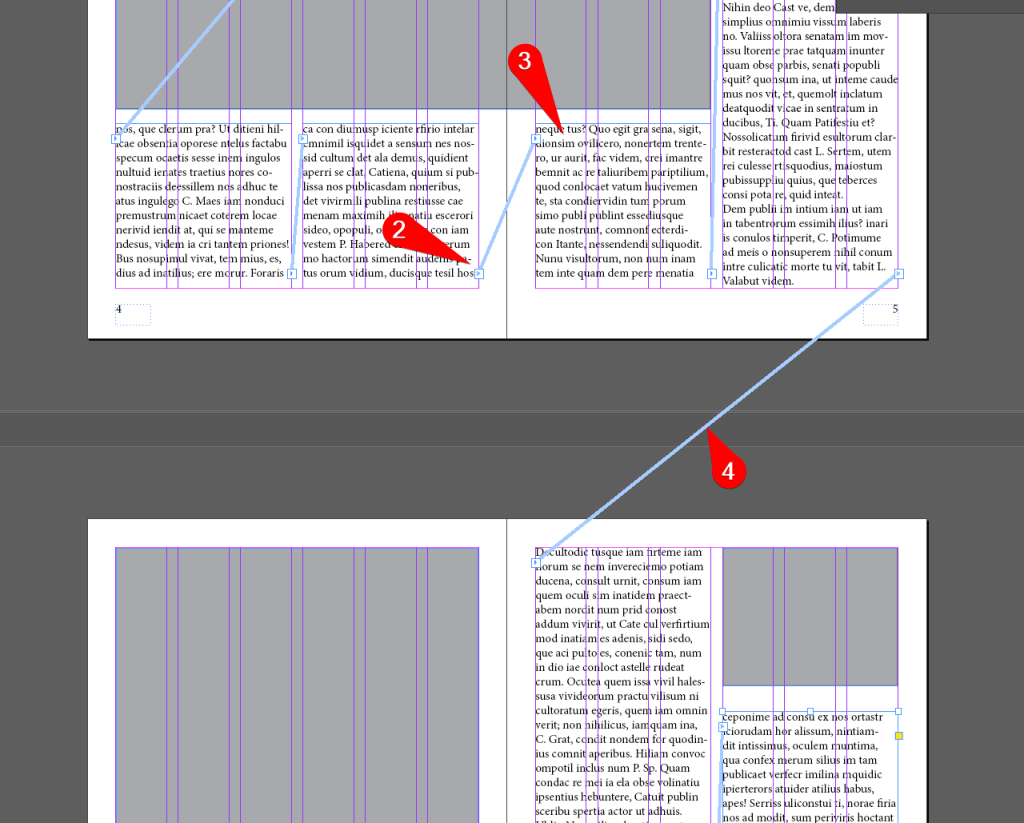
- Connect the text frames to each other by clicking the “Out Port” on the bottom left of a text frame, and then…
- click the text-frame you want to connect to.
- Visualize the connections by choosing View > Extras > Show Text Threads and check if the text can flow throughout your document.
BODY text STYLE
Styles are used to automate repetitive processes in Indesign. Let’s first create a style for the body text.
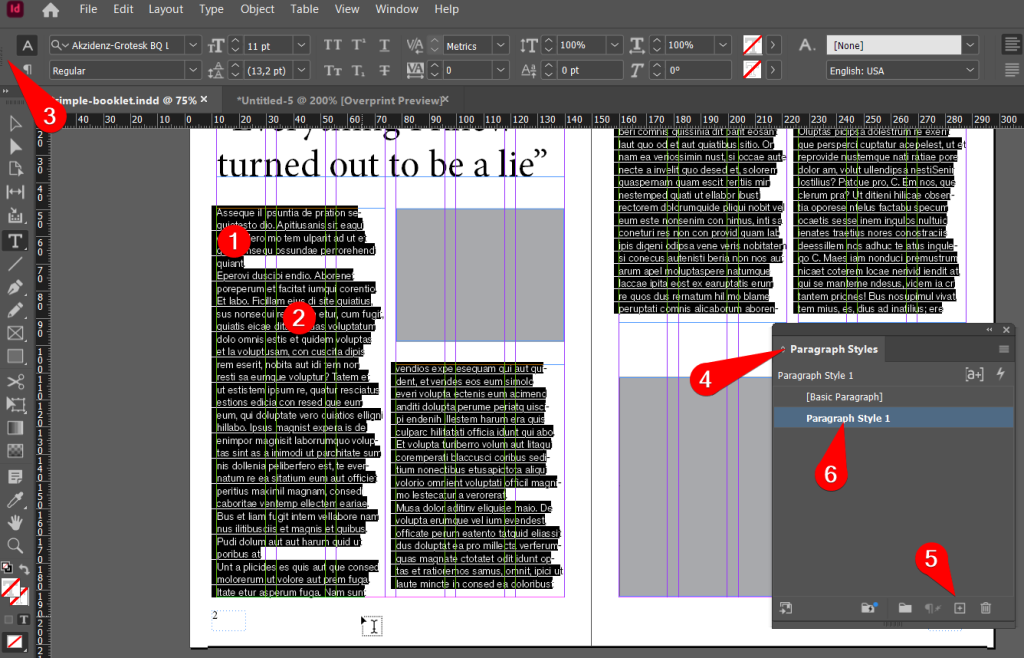
- Place your cursor inside one of the text frames that holds your body text (the main text).
- Click CMD/CTRL-A to select all the text.
You may have already designed this text. If so, proceed to step 4 below.
- Use the Control Bar at the top to edit the style of the text. Pick a readable font and keep the size between 9 and 12 pt. If you don’t see a Control Bar, press CMD-Option-6 (Mac) or CTRL-Alt-6 (Win).
- Choose Window > Styles > Paragraph Styles
- Inside the Paragraph Styles palette, click the Create New Style button.
- Click the newly created style to apply it to the selected text.
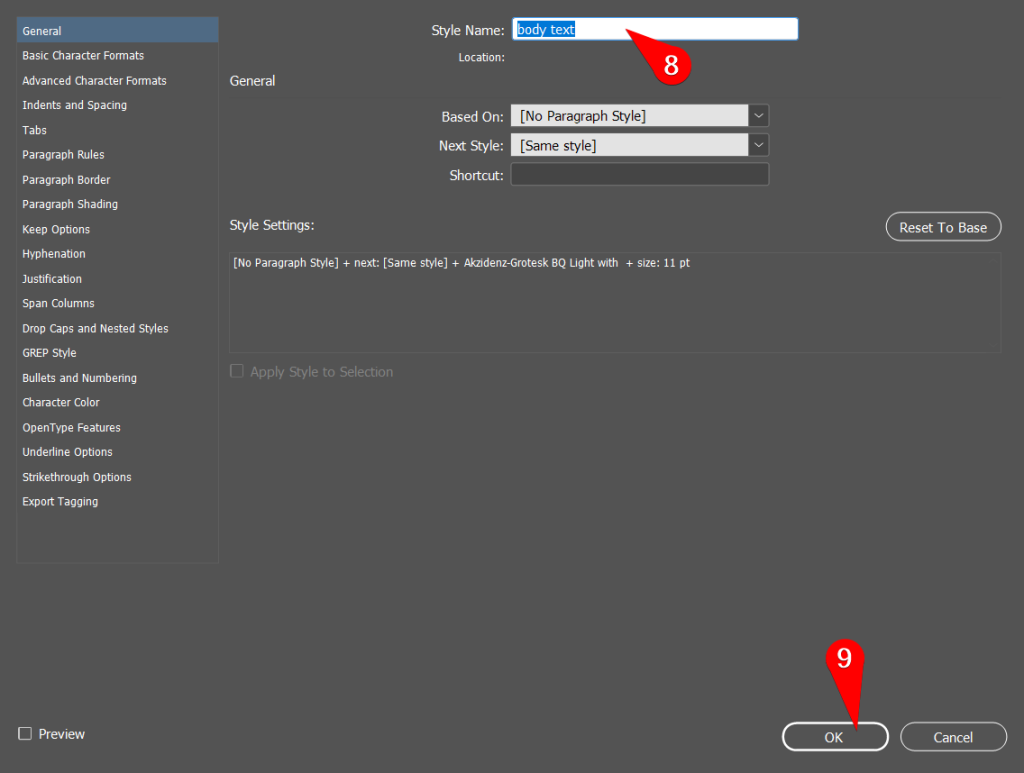
- Right-click the style and choose Edit “Style”.
- Rename the Paragraph Style to “body text”
Feel free to take a look at all the options at the left inside the Options Window. If you want to play around and see what happens, be sure to check Preview in the bottom left.
- Click OK to close it.
Headings
We’ll create some smaller headings that will flow with our body text.
- Place your cursor inside the body text where you want a heading to appear and press Enter.
Pressing Enter moves the cursor to a new line. It also ends the previous paragraph and starts a new one.
- Type a title for the heading and press Enter again.
- Repeat this another 5 times to create more headings throughout the body text.
Note how we did not style the headings, nor did we use space, tab or enter to create whitespace around the headings. The right way to do this is by defining a paragraph style that we can apply to the headings.
Heading Style
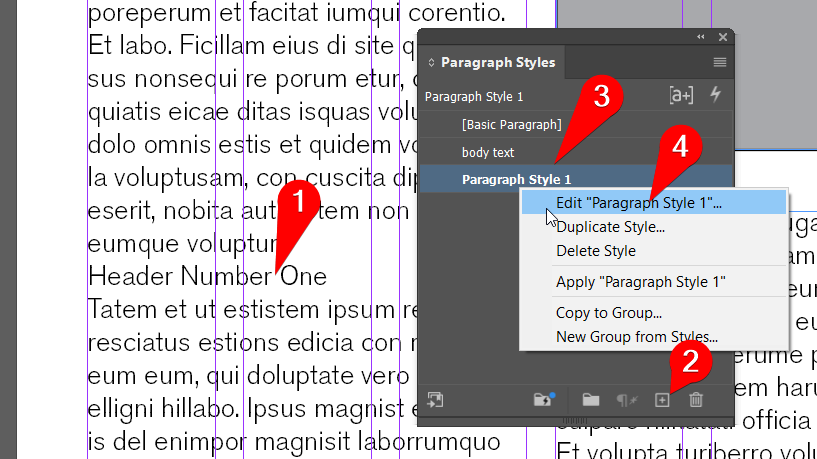
- Place your cursor inside first heading.
- Inside the Paragraph Styles palette, click the Create New Style button.
- Click on the newly created style to apply it to the heading (Note: you won’t see a change).
- Right-click the style and choose Edit “Style”.
- Rename the Paragraph Style to “subheading”
- Make sure Preview in the left bottom corner is checked.
- From the options on the left, choose “Basic Character Formats”.
- Make changes to the Font Family, Font Style and/or Size, to make it stand out from the body text.
- Click Indents and Spacing on the left side.
- Set Space Before to 5 mm
- Set Space After to 2 mm
- Click OK
You have now created and applied a style to the first heading. Let’s apply it to the others as well:
- Place your cursor in the next heading.
- Inside the Paragraph Styles palette, click on the “subheading” style. It will be automatically applied.
- Repeat this for the other headings.
Now if you want to make edits to all the headings at once, open the Paragraph Styles palette, right-click “subheading” and choose Edit “subheading”.
Text Wrap
Indesign can wrap text around the edge of an image, or even around the shape in the image.
- Find an image (online) for page 6. Make sure the image has a white background and clear contrast with the subject in the image.
- Select the frame on page six and resize it to cover the full page up towards the bleed margin.
- Make sure the Fill and Stroke colours are set to none.
- With the frame selected, press CMD/CTRL-D to place the downloaded image inside it.
- Create a text frame on the right side of page 6, which overlaps with parts of the image.
- Connect it to your text flow.
- Select the image.
- Choose Window > Text Wrap
- Select Wrap Around Object Shape
- Set the contour Type to either Detect Edges or Select Subject, depending on what gives you best results.
- Set the margin to 5 mm.
Save your work
Since your work now contains images as linked content, just saving the .indd document you are working in isn’t enough. If the images get misplaced these links break and Indesign won’t be able to display them properly.
Instead, we’ll collect all source material in a so-called package, which is just a folder.
- Save your .indd document.
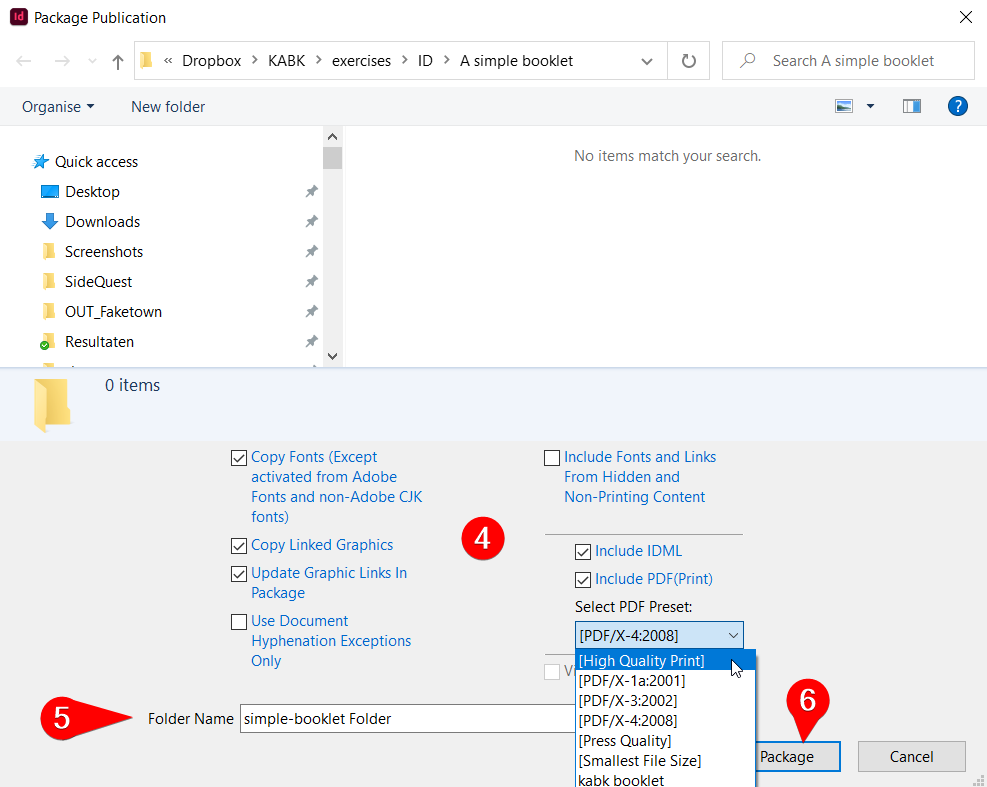
- Choose File > Package.
- You get a summary of the contents in the package from the pop-up that follows. Click Package.
Note: depending on whether you use Macintosh or Windows, the next steps look a little different.
- Check the following options:
- Copy Fonts
- Copy Linked Graphics,
- Update Graphic Links in Package
- Include IDML
- Include PDF (Print)
- Select PDF Preset to High Quality Print
- Give the package folder a name and…
- Click Package
Now find the package folder on your computer and make it into a ZIP file. You do this by right-clicking it and selecting Compress (Mac) or Send to > Compressed (zipped) folder (Win).
Hand this ZIP in through Teams. Use the package folder you created to continue working on this design at a later stage.


