To select a certain area of a layer that you want to edit, you need to make a selection. Photoshop offers several types of selection tools, and other ways to isolate a certain set of pixels. Together with the Move Tool, for instance, you can perform basic transformations.
Time: 45 minutes
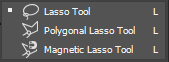
Lasso Tool
This tool draws a selection. Click and drag to start drawing the selected area. If you release the mouse, the selection is closed.
Polygonal Lasso Tool
This works like the Lasso tool, except you click to place straight line segments. To close, click your starting point (or double click anywhere).
Magnetic Lasso Tool
This works like the Lasso tool, except you click to start drawing. When you draw, Photoshop looks for area’s of contrast and draws in between. To close, click your starting point (or double click anywhere).

Rectangular, Elliptical, Single Row/Column Tool
These tools all draw a selection in a basic shape. Hold Shift on to lock the selection to a 1:1 ratio (to draw a Square or Circle). Hold Alt to draw from the center of a shape. Single Row and Column Marquee Tools select a row or column of pixels across the width or height of the canvas.
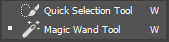
Magic wand Tool
This tool selects an area based on the pixels you click. For example, if you click a white area, Photoshop will select all adjoining white pixels. The margin with which it selects off-white pixels is set by the Tolerance setting in the tool’s Options Bar. Uncheck Contiguous to select all white pixels on the canvas (instead of only selecting adjoining pixels).
Quick Selection Tool
This tool selects an area based on the pixels you click (and optionally: drag). For example, if you click (and drag) a white area, Photoshop will try to select all adjoining white pixels. It uses an algorithm to determine the edge by contrast (such as brightness, hue or saturation).
We are going to create this image:

First, open tennisballs.jpg in Photoshop and unlock the background layer.
- Let’s rotate the first ball:
- Choose the Elliptical Marquee Tool. Hold down Option/Alt and Shift, then click and drag from the center of the first ball. Release the mouse to finish you selection. Fine-tune the selection’s position with the arrow-keys.
- Choose the Move tool. Make sure Show Transform Controls is checked in the Options Bar. Also, uncheck Auto-Select.
 Now hover your cursor slightly off one of the corner handles. It shows you the rotation icon. Now click and drag to rotate the ball. Press Enter or click the checkmark in the top right of the Options Bar to commit the rotation.
- Press CMD/CTRL-D to deselect.
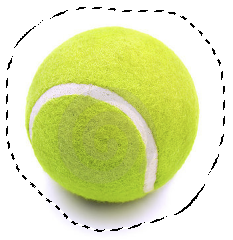
- Let’s color the second ball:
- Choose the Lasso tool and draw a selection around the second ball. Make a wide selection: cut through the white background, not through the ball.
- Choose Image > Adjustments > Hue/Saturation (or press CMD-U).
- Now slide the Hue slider to change the ball colour.
- Press CMD/CTRL-D to deselect.
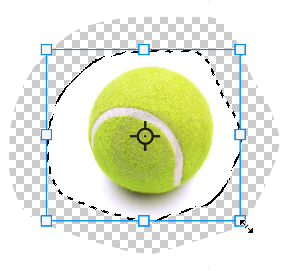
- Let’s squeeze the third and fourth ball:
- Choose the Lasso tool and draw a selection around the third ball.
- Choose the Move Tool and hold down Alt (to make it scale from the center).
- Drag the top-middle handle down a bit. You can now see the ball transforming. Ignore the bits of transparency, we’ll restore this later.
- Press Enter or click the checkmark in the top right of the Options Bar to commit the transformation.
- Choose Select > Deselect (or press CMD-D).
- Now repeat this for the fourth ball, this time squeezing it horizontally.
- Let’s scale the fifth and sixth ball:
- Choose the Lasso tool and draw a selection around the fifth ball.
- Choose the Move Tool and hold down both Shift (to lock the aspect ratio) and Alt (to scale from the center).
- Drag one of the corner handles inwards a bit. Release the mouse when the ball is half its original size. Ignore the bits of transparency, again: we’ll restore this later.
- Press Enter or click the checkmark in the top right of the Options Bar to commit the transformation.
- Choose Select > Deselect (or press CMD-D).
- Now repeat this for the sixth ball, this time scaling it up a bit (enlarging).
- Lets blur the seventh ball:
- Choose the Quick Selection Tool and position your cursor over a yellow part of the ball. Click and drag over the ball to grow the selection. Release when the ball is fully selected.
- Choose Filter > Blur > Gaussian Blur. Set the radius to 10 pixels and click OK.
- Now let’s fill those holes:
- Click the New Adjustment Layer button in the Layers palette.
- Choose Solid Color. In the Color Picker select white and click OK.
- Drag the layer to the bottom of the stack.
- For enthusiasts:
- Try to recreate the images for the eighth and ninth ball in the example above.