To prevent your PDF being rejected by the printer or even worse: have it misprinted, you need to check the document against the print requirements. Every other printer may require different ways of creating your PDF. This page let’s you check a couple of basic print settings that are common.
Before you export to PDF, check your workdocument for the following:
Check if your document is the right size. First, make sure you know what size your design should be printed at. Wikipedia provides an overview of standardized paper sizes. Below you can find the size requirements for the Open Day project deliverables
Open Day project deliverables
| Product | Size (mm) | Size (mm) incl. bleed | Minimum Size (px) | Minimum Size (px) incl. bleed |
| Postcard | 148*105 | 154*111 | 1734*1230 | 1805*1301 |
| Domain poster | 840*550 | 846*556 | 4922*3223 | 4957*3258 |
| Hallway poster | 1100*840 | 1106*846 | 4297*3281 | 4320*3305 |
| Booklet | – | – | – | – |
| Signage | – | – | – | – |
How to check document size in Photoshop?
- Open the document
- Choose Image > Image Size
How to check document size in Illustrator?

- Open the document
- Choose File > Document Settings
- Click Edit Artboards
- You can find the current Artboard size in the properties bar
How to check document size in InDesign?
- Open the document
- Choose File > Document Setup
Resolution is the number of pixels (or dots) per inch. Check whether your document or images have a high enough resolution for the size you want to print at. The minimum required resolution for the Open Day deliverables is:
- Hallway poster: 100 dpi
- Domain poster: 150 dpi
- Booklet: 300 dpi
- Signage: 300 dpi
- Postcard: 300 dpi
The pixel dimensions in the “Size” tab are based on these minimum resolutions. You can go higher, but at the cost of an increase in filesize. Don’t go too big or your document becomes unpractical (slows your computer and takes forever to transfer over the internet).
How to check document resolution in Photoshop?

- Open the document
- Choose Image > Image Size
- Check if the minimum pixel dimensions are met.
How to check document resolution in Illustrator?
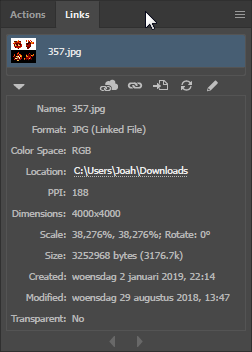
- Open the document
- Choose Window > Links (if the panel isn’t already visible)
- Select any placed pixel image in the links panel
- Check for PPI
- Repeat this for all pixel images used in the document
How to check for document resolution in InDesign?
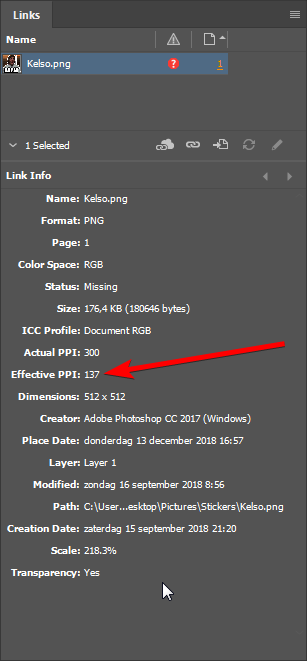
- Open the document
- Choose Window > Links (if the panel isn’t already visible)
- Select any placed pixel image in the links panel
- Check for Effective PPI
- Repeat this for all pixel images used in the document
Bleed is a safety margin for the exact location where your the edges of your design will be cut clean from a larger sheet of paper. A standard bleed size for print is 3 mm.
How to check for bleed in Photoshop?
There is no specific bleed setting in Photoshop. Instead, make sure to use a minimum document size that includes a margin for bleed (check the ‘Size’ tab).
How to check for bleed in Illustrator?
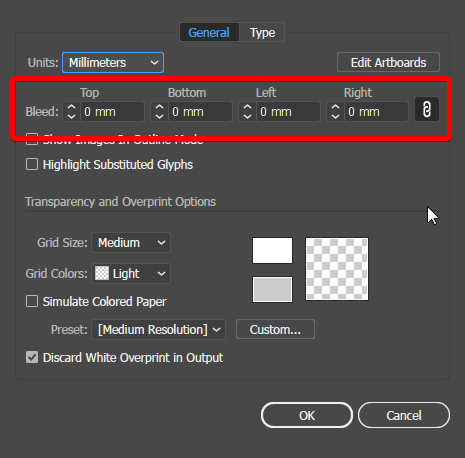
- Open the document
- Choose File > Document Setup
- Set the required bleed
How to check for bleed in InDesign?
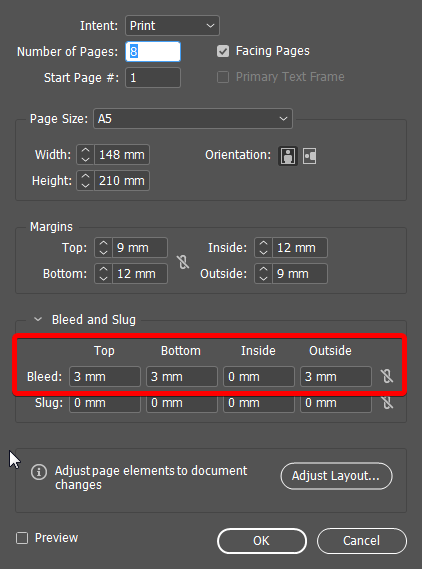
- Open the document
- Choose File > Document Setup
- Expand Bleed & Slug (if not already expanded)
- Set the required bleed
Important: When bleed is correctly set, check all the edges of your document for images and graphics that are aligned to the edge of the page. Make sure they run off of over the edge, up to the bleed margin the page.
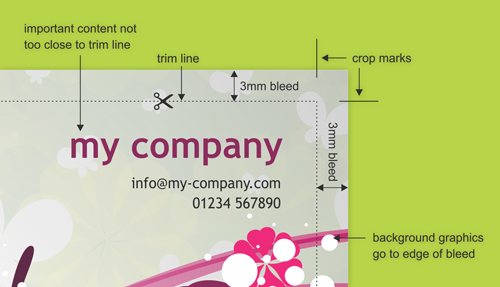
Now create a print PDF.
After you’ve created a print PDF, check the PDF in Acrobat Pro:
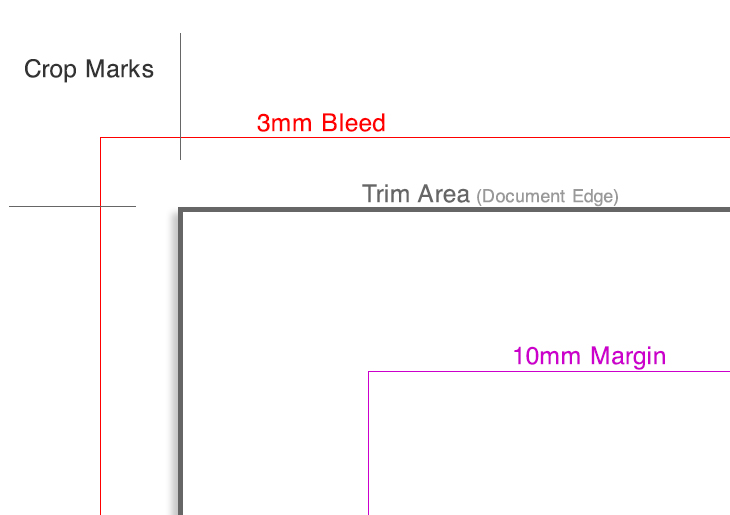
This is relatively easy: open the PDF you created in Acrobat Pro and just take a look. Check if the page has correctly placed crop marks (as in the example below).
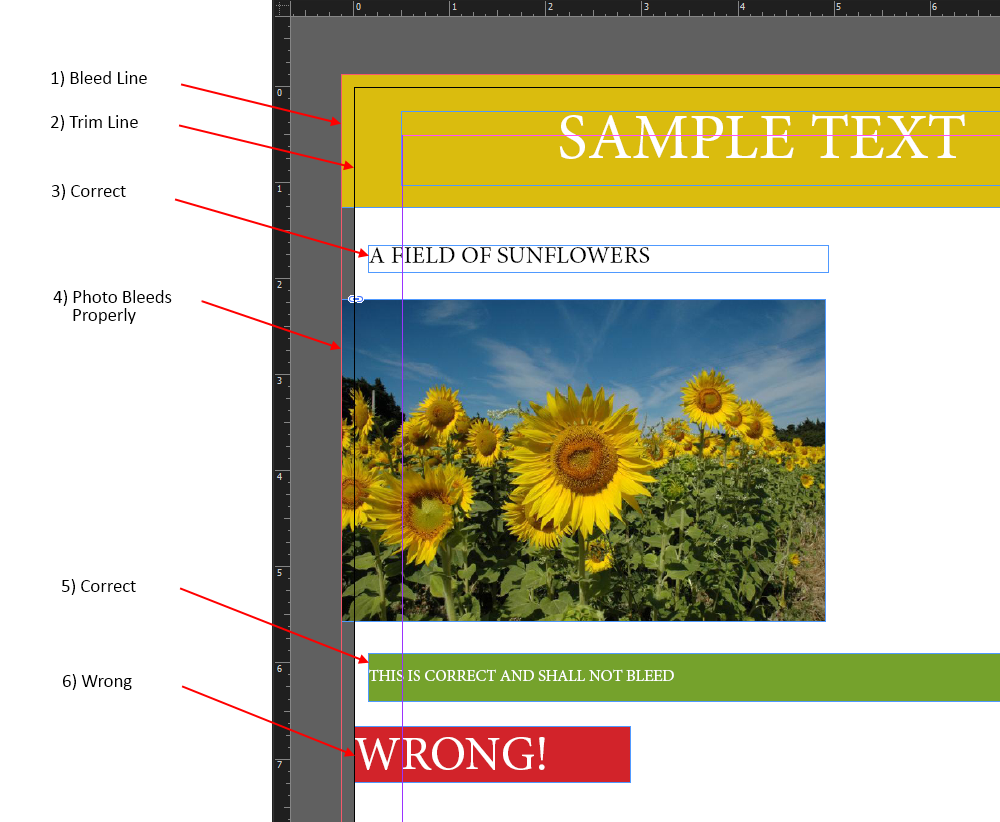
Also check if all graphics extend to the bleed margin edge as shown in the example below.

You’ve set the color profile when you created your PDF, but did it actually get exported with your PDF? To check you go to View > Tools > Print Production > Open. This will give you a sidebar similar to the one shown to the right here.
Click Output Preview. In the top of the window that pops up (under Simulation Profile) it shows you the current file’s color profile. Check if this is correct and close the window.

To check whether you’ve used the correct PDF preset, or to check if your document is still complient with any of the standards, you can use something called a “Preflight Check” in Acrobat. First, choose View > Tools > Print Production > Open. This will give you a sidebar similar to the one shown to the right here.
Now click Preflight. It takes a minute to load all profiles. You can see a long list of profiles. Select the profile you want to check against, for instance compliance with the PDF/X-4 standard or the Sheetfed Offset (CMYK) standard and click Analyze.
The analysis possibly gives you warnings, indicated by a yellow exclamation mark. You might want to try and fix these warnings, but you’d have to know where to look. As long as it’s just warnings and not errors, you’re presumably ok. Errors are indicated with a red X and that means the test has failed on a critical aspect. If this is the case, check the error message and try to resolve it.