 InDesign places images in your document as linked files. This means whenever you edit the image file outside of InDesign, it will be updated within InDesign.
Indesign uses the relative file path to find linked files. If you change the location (path) between your INDD document and the linked files, these links break. They need to be relinked to be able to export a full resolution document from Indesign.
Time: 15 minutes
Continue from the previous exercise
Steps:
- Choose File > Place and select an image from your computer
- The image is loaded in the cursor. Click and drag a frame with the loaded cursor to place the image in your document.
Note: this places it at any size you choose. When placing raster images, this is where the effective resolution comes into play. Check the Effective PPI inside the Links palette (Window > Links). Make sure Effective Resolution is at least 300 PPI. - Hover the mouse over the image an click the circle that appears in the center.
Note: the frame is now brown/orange in color. You are editing the image instead of the frame. - Experiment with resizing and positioning to see how the frame acts as a clipping mask.
- Right click the image and choose Fitting > Fit Content to Frame. This adjusts the image back to the frame position and size.
- Now click outside the frame to deselect it.
- Reselect the frame by clicking inside it, but do not click on the circle in the middle
Note how the frame-edge is now blue: you are editing the frame and not the picture. - Now overlap the image with some of your body text.
- Select Window > Text Wrap. This palette gives you different options on how the text should run around the image.
- Experiment with different options.
Tips
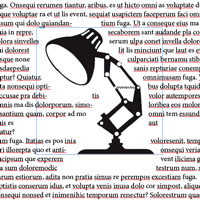
- When using images that have a white or transparent background you can run text along the image outline (effectively ignoring white or transparent pixels).
- From the Text Wrap palette, choose Wrap Around Object Shape.
- Under Contour Options, choose Detect Edges or Alpha Channel.
- Use the Top Offset setting to set the margin around the shape.
Materials
- None
Hand in
- None, however make sure to save your documents somewhere you are able to access them in the future.