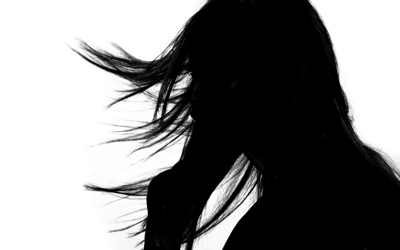
This exercise takes the concept of masking to where it becomes very useful. Consider selecting individual strands of hair, blowing in the wind. None of the selection tools can do it, but masks can. Here’s how.
Time: 60 minutes
The technique
We start out with two images:
- First, the girl with wavy hair, set in front of a greyish studio background,
- Second, the beach background.
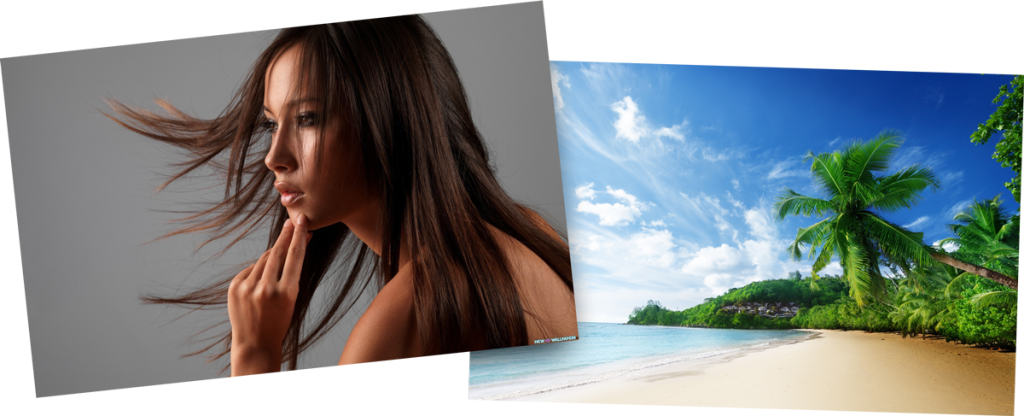
Our aim is to hide all the pixels in the ‘girl’ image that contain the studio background. Hidden pixels will become transparent and will show the ‘beach’ image below it.
A layer’s mask contains the visibility information of the layer’s pixels. Black parts of a mask will hide the layer’s pixels, and white parts will show them. So we need a black and white ‘map’ of the girl layer, where the girl and her hair are white and where the background is completely black.
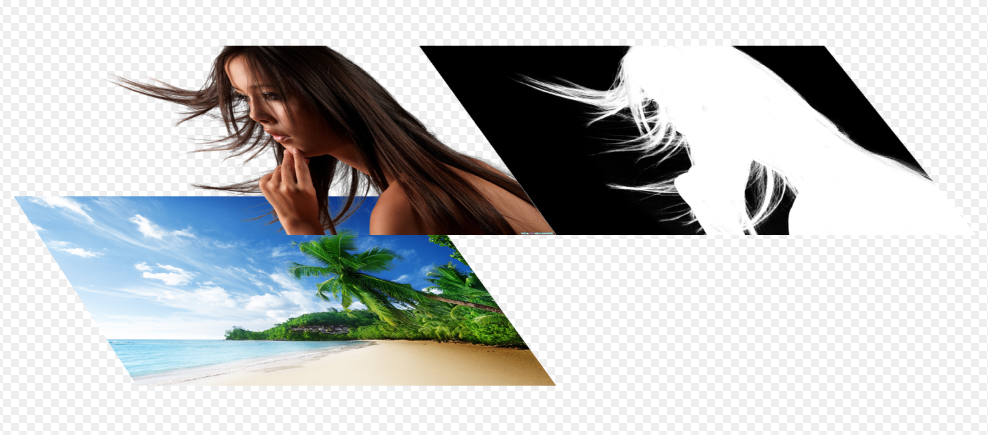
To create this silhouette we’ll use a black-and-white version of the image and increase the contrast between the background and the girl, all the way to pure white and pure black. However, to preserve fine details in the hair we need individual hair strands to remain shades of grey.
Step One – Create a mask from a selection
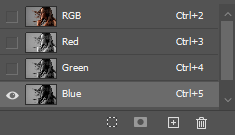
One way to find a high-contrast black and white version of the image is to look at the channels (Window > Channels). Channels represent the amount of individual colors in the colorspace (in this case RGB). Each channel provides a black and white ‘map’ we can copy. In this case, the blue channel gives us most contrast between the hair and the background.
- Open Girl at the beach.PSD in Photoshop.
- In the Channels palette, click on the name of a channel to single it out. This shows you the amount of its color in black and white. In this case, the blue channel gives us most contrast between the hair and the background.
- Hold CMD (or CTRL) and click the blue channel.

When CMD clicking a channel like this, you create a selection based on the black and white map. Every white pixel is fully selected and every black pixel is not selected. Every greytone in between is partly selected by a percentage of its lightness.
- Now click on the name of the top channel (RGB) to display all channels again.
- In the Layers palette select the girl layer and click the New Mask icon.

When adding a new mask to a layer, while having an active selection, the new mask will automatically contain the selection as a black and white map.

Step Two – Increasing Contrast
- Hold down Option/Alt and click the mask thumbnail to view the mask.
You are now seeing the same black and white image as in the blue channel, but this time it is the mask of the girl layer. Next, we are going to increase the contrast to a maximum, while keeping the details of the hair strands visible in greytones.
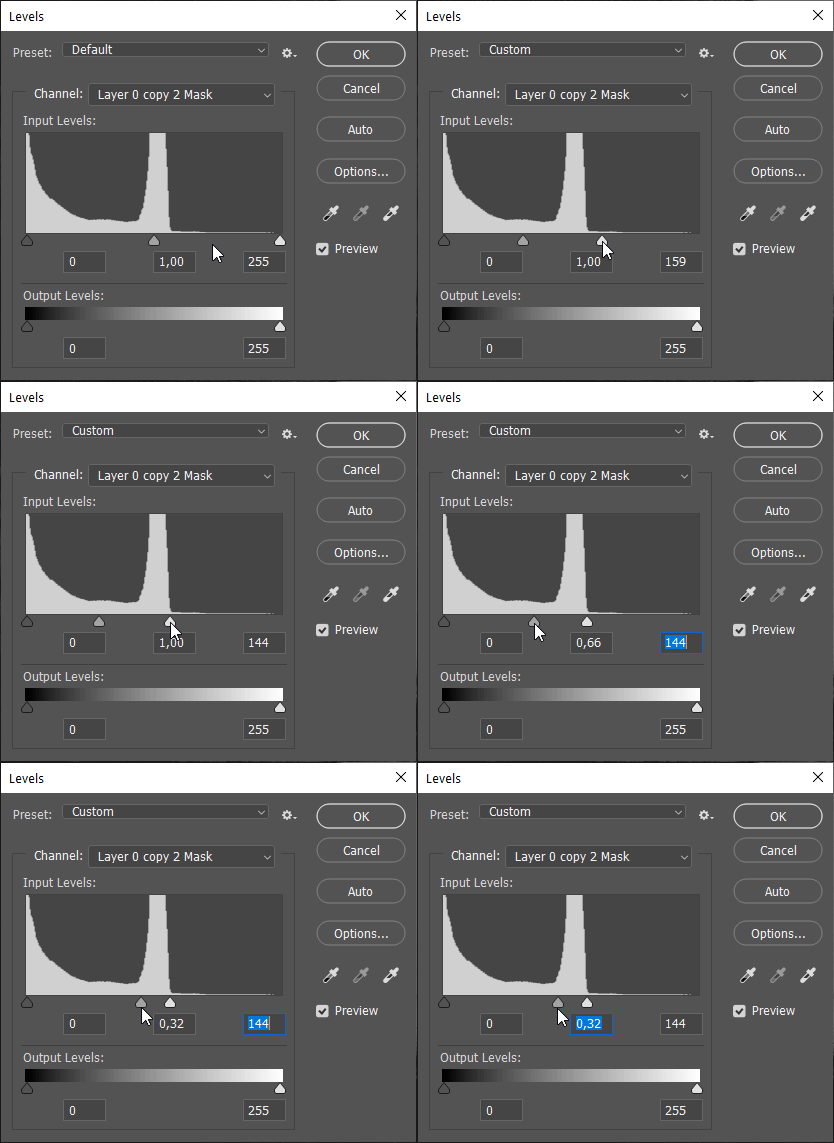
- Increase contrast using Levels/Contrast (CMD-L)
- Adjust the black/grey/white points
- Try to get the background to be 100% white, while the hair goes as dark as possible, without losing detail in the strands of hair. The hairs should stay grey, not become black.
- In addition, use the Dodge tool to brighten up the background. Do this with a relatively large brush (~800-1200). Set Range to highlights and Exposure to 20%.

Dodge tool
This tool can brighten up area’s of the selected layer or mask. You can restrict the range of brightness values it affects, by setting Range to either Highlights, Midtones or Shadows. The exposure value indicates the amount of brightening a single stroke will do.
Step Three – Drawing the silhouette
You should now have a bright background and dark hairstrands. Next step is to complete a silhouette. Once this is done we will invert the black and white values so that the background is masked out.
In the previous step parts of her face and body have also been brightened. These should actually be part of her silhouette, so let’s paint them in.
- Select the Brush Tool and set the size to something like 100 and the sharpness to 100%.

Brush tool
This tool lets you draw lines like an analogue brush. It draws with the foreground color. When drawing inside a mask, press X to quickly switch between foreground and background color.
- Select black as foreground color.
- Paint over the area’s that should be part of your silhouette. Zoom in if needed and adjust the brush size accordingly.

Be careful not to color over the outer edge of the silhouette. If this happens, use undo (CMD/CTRL-Z) instead of correcting with a white brush.
- In addition, you may want to use the Burn tool on the hairs to darken them. Set Range to Midtones or Shadows and Exposure to around 20%.
Note the edges of your silhouette and the strands of hair should be grey, rather than fully black.

Burn tool
This tool can darken area’s of the selected layer or mask. You can restrict the range of darkness values it edits, by setting Range to either Highlights, Midtones or Shadows. The exposure value indicates the amount of darkening a single stroke will do.
Step Four – Finalize
You should now have a black and white mask, with details in greytones preserved around the silhouette edges. Last step is to invert the mask.
- With the mask selected press CMD-I to invert black/white.
- Click on the Layer icon to see the result.
If needed, you can correct your mask until you are satisfied. Save your final work both as a PSD file and a JPG file and hand them in. Please give the files a recognizable name 🙂

