In this exercise you will design a couple of cards from a full deck of cards. Together with the class we’ll design all 52 playing cards. To get a playable deck of cards, we need to set out some rules and guidelines as a framework. Within this framework you’re free to do whatever you like.
Time: 120 minutes
First off, we’ll divide the work.
SETUP
- Randomly pick two cards from a deck. These are the cards you will design. If you pick a Joker, that means you’ll design the backside of the cards!
In order to get all 52 cards designed, more experienced students may get a third or even fourth card assigned by the teacher.
- Download this template file.
This template has two layers called template and design. The template layer is set to non-printing, so you won’t see this in the final design.
Try to understand the template:
- Bleed Margin
All graphics that run up to the edge of the paper should extend to the bleed margin in order to allow for cutting errors. - Cutting Edge (the card has rounded corners)
This indicates the page (or card) edge. The card will be cut along this line. This line is an object inside the A-parent. - Inner margin
This indicates the margin to keep from the edge when placing your main content, such as (the subject of) an image or text. This line is an object inside the A-parent. - Suit and Rank
These circles indicate the placement of your design for the suit and rank of your card. Try keep within these margins as much as possible. These objects are also inside the A-parent. - Column
This indicates the main focus area of your design. The corners of the column are the centerpoints of the rounded page edge. This value is set in the document’s properties. - Horizontal guide
This horizontal line indicates the vertical middle of the card. This is a ‘guide’ object inside the A-parent.

Important
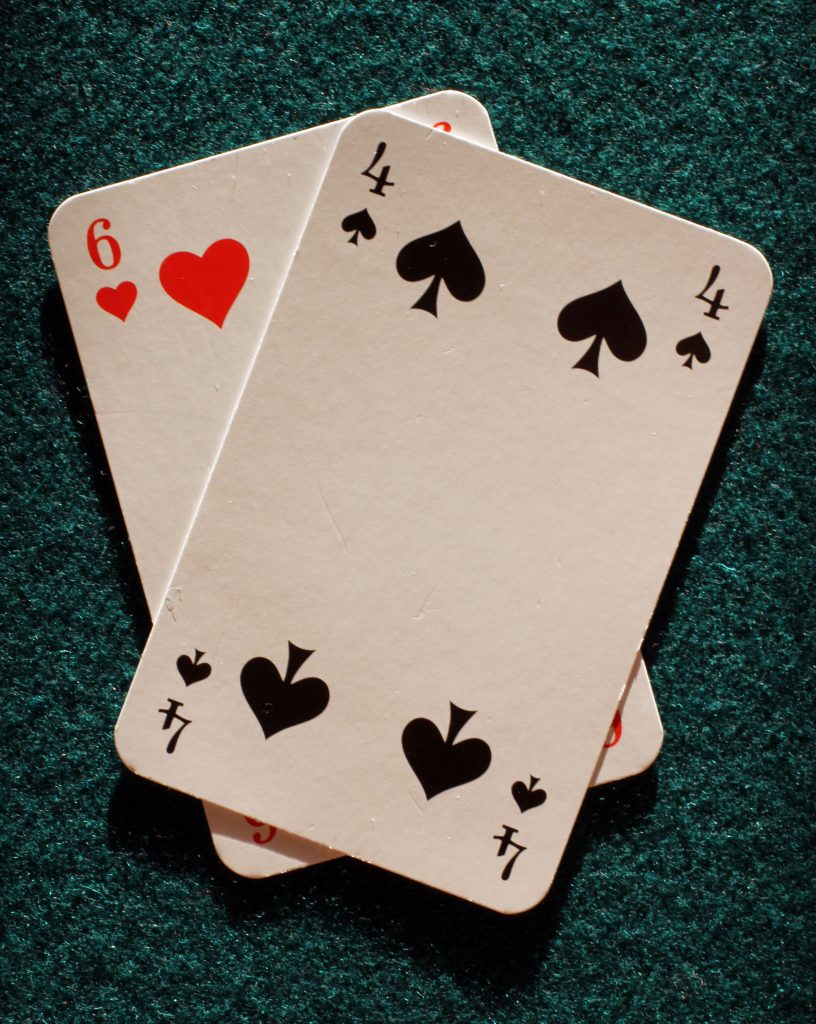
Look at the image to the left. Note how the cards are held. Cards in the back only show the top left corner. So make sure the top left corner always shows the suit and rank, even when the card is held upside down.
Design
- Take some time to come up with an idea. If needed, read the inspiration section below.
- Make pencil sketches if you need to.
Your basic choice of design elements is between vector objects (fonts, shapes, illustrations) and raster (pixel) objects (photography, illustration).
- Collect assets. These are the different elements you will work with, such as fonts and images.
- Place your assets and experiment to get the layout you want.
- Make sure the class and suit is readable and of the right color, ie.
- rich black (C=70 M=50 Y=30 K=100)
- red (C=15 M=100 Y=100 K=0).
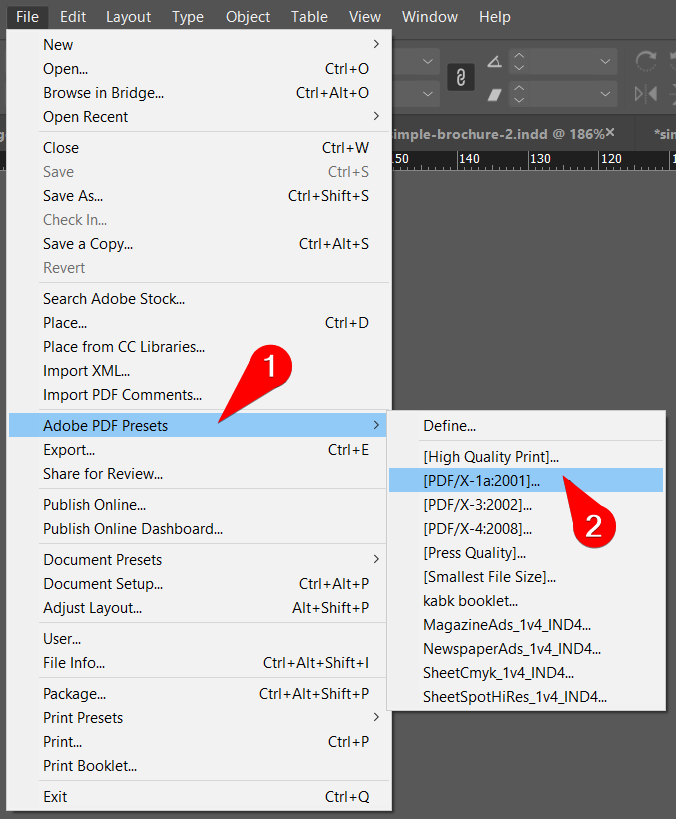
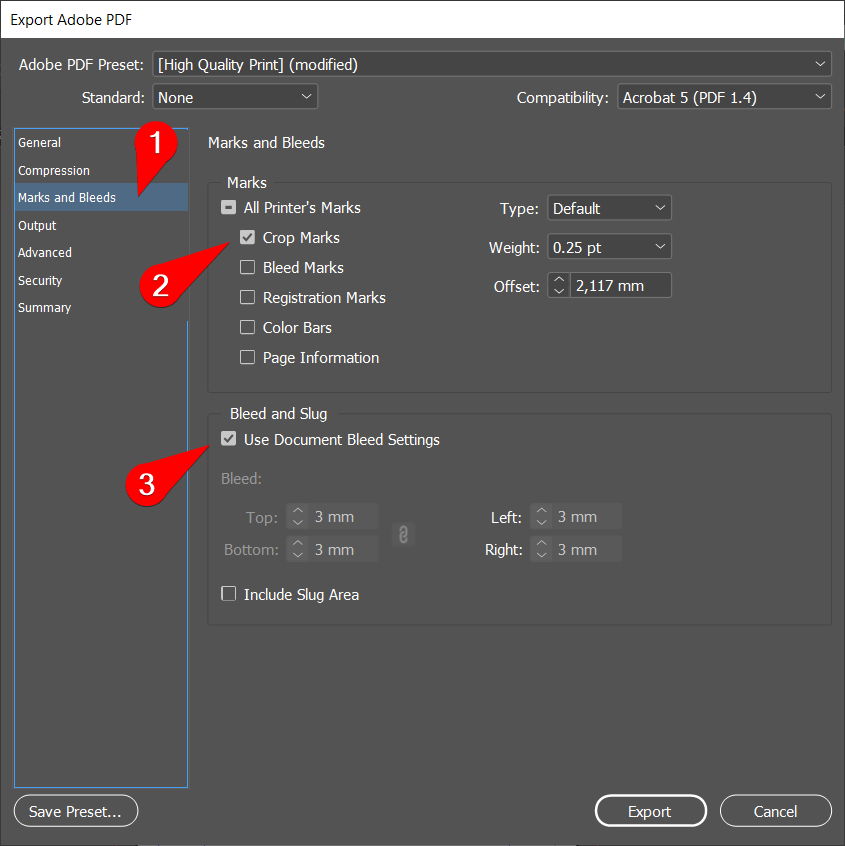
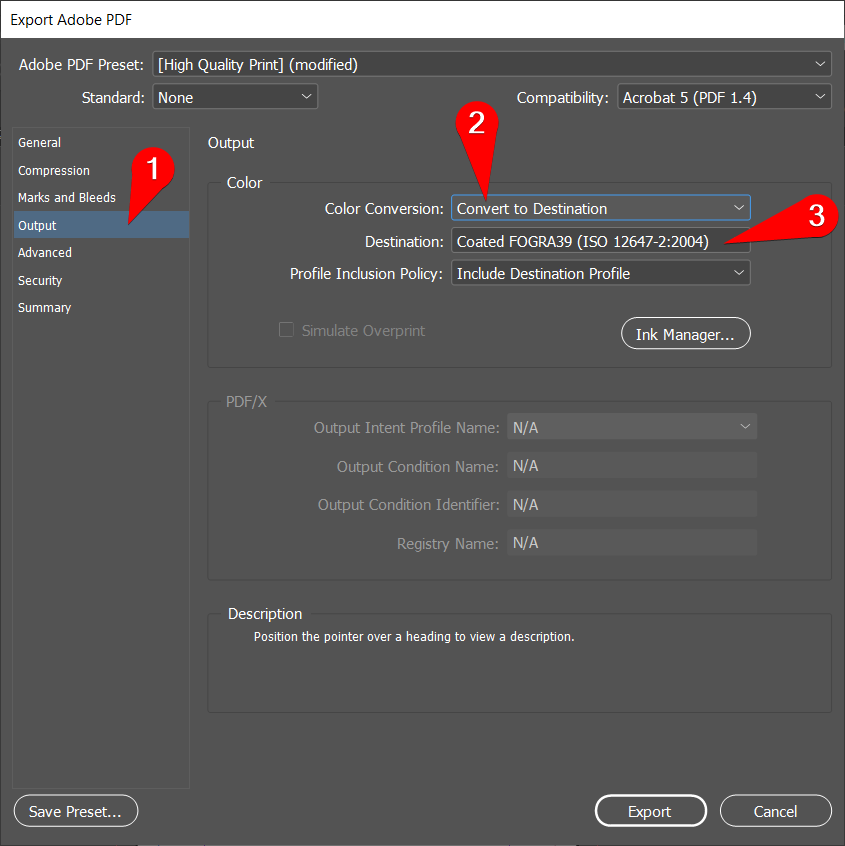
- Save each individual card as a pdf using these specs:
- Preset: PDX/X-1a:2001
- Profile: FOGRA39L or Coated FOGRA39
- Bleed: 3mm
- Cropmarks: YES
- Single pages (no spreads)

Creating assets
Indesign is typically used to create a layout out of different design elements or assets. You can use software like Photoshop and Illustrator to create these.
Note: If you have no experience using these apps, just take a dive. Look for online tutorials, ask your classmates or ask the teacher.
Inspiration
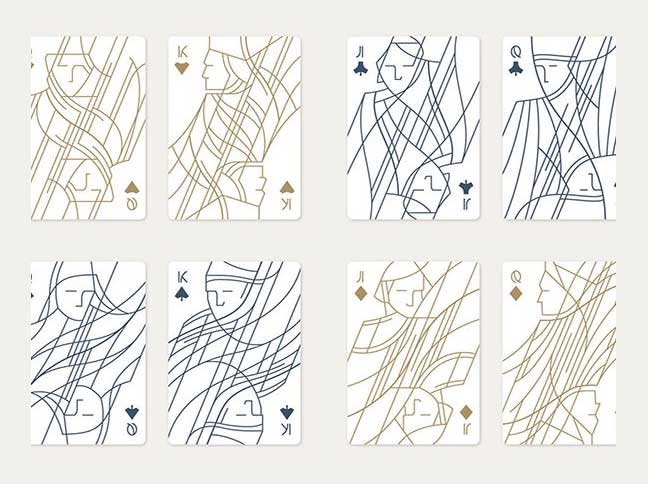
There is quite a lot of history behind the design of playing cards as we know them today. From the suits and ranks to the development of the game, the card design community is still very alive today.
There are many artists inspired to make illustrative, photographic or graphic designs for playing cards. You can also think of instructional texts, poems, quotes, life-hacks, or just some good advice to put in your design.


