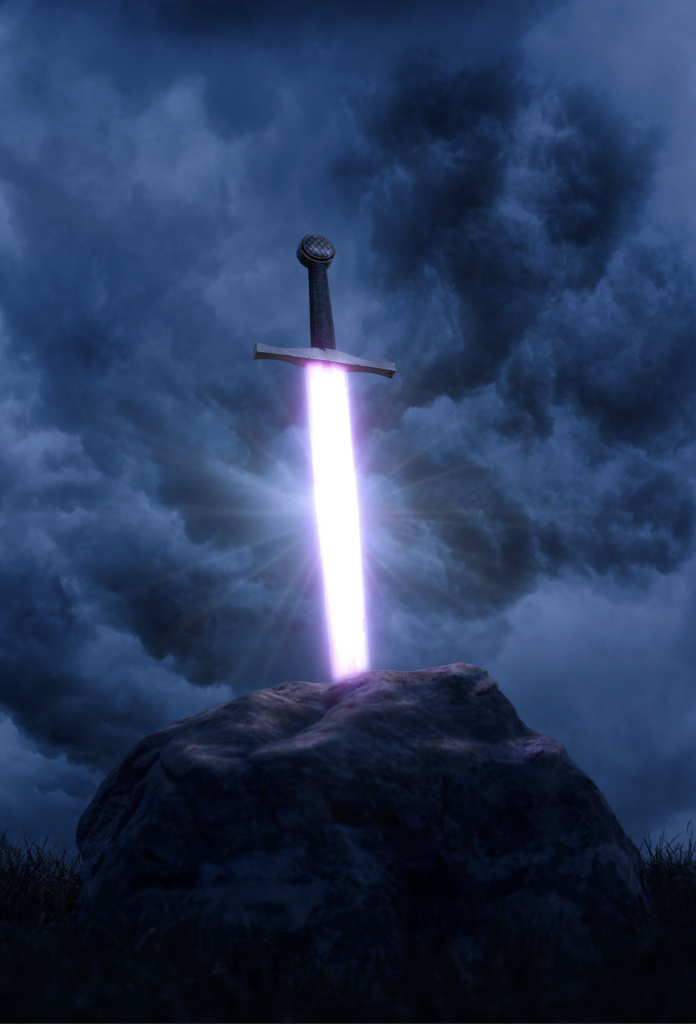
In Photoshop, you can make something glow as if it were a light itself. You can also create lighting by working with adjustment layers and masks. In this exercise you will make the sword Excalibur glow as if it possesses magic power…
The exercise consists of several steps:
- Make selections from the stone and blade of the sword.
- Turning the whole picture into night
- Create glow and color on the blade.
- Create light on the stone and give color.
Optionally, you can also take the following steps:
- Add light texture.
- Mask the background and replace it with something else.
The source we start with is a rendering of a sword in a stone in daylight. We will first create three masks (or selections) that we can use later.
Download the source file and open it in Photoshop.
First the sky. The goal is to achieve as tight a silhouette as possible while allowing the pixels on the edges to remain a little gray, as in the example on the left. We can use this to change the sky in the background.
- Make a copy of the background layer (CDM-J)
- Make it black and white using Image > Adjustments > Black & White and choose the High Contrast Blue Filter.
- Increase the contrast between the sky and the foreground using Levels (CMD-L).
- Look at the mask (Alt/Option-click the mask thumbnail) and use Dodge and Burn to clean up the last spots (use the Range setting to limit the effect to low, mid, or high lights)
- Name this layer “sky”.
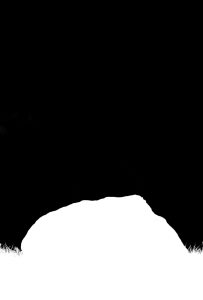
Next up is the stone. The goal is to have a mask that we can use to draw in the light that is cast from the sword onto the stone, while restricting this light in the sky area.
- Now make a copy of the black and white silhouette, and erase the sword from it.
- Follow the original photo where the sword hits the stone. Set this layer to semi-transparent (Opacity: 50%) to see this border well.
- Invert the contrast (CMD-I).
- The resulting silhouette is similar to the example below.
- Name this layer “stone”.
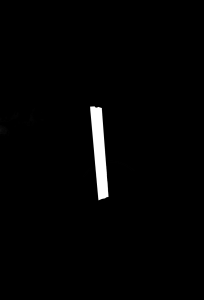
Last is the blade. The goal here is to have a mask we can use to build the glow with.
- Make another copy of the “sky” layer (CDM-J).
- Now erase the stone up to the blade of the sword.
- You also erase the cross-guard and handle of the sword. Only the blade of the sword remains in the mask.
- Invert the contrast (CMD-I).
- You should now have a third silhouette that looks like the example on the left. Name this layer “blade”.
In this step we will let the night fall and give the blade a glow in a color of our choice.
First, let’s turn this into night. Using a Color Lookup Table we can convert colors from one color to another according to a table.
- Select the background layer with the original image and add a new Adjustment Layer: Color Lookup.
- For 3DLUT you choose the option Moonlight.3DL. This turns everything into night light.
Now we are going to make the blade glow. For this we will color the blade using the blade mask. We’ll make three copies of this layer, and then blur them in increasing steps. Added together they give a good looking glow. To be able to tweak the different blur settings later, we use Smart objects with Smart Filters.
So let’s color the blade:
- Add a new Solid Color Adjustment Layer above the Color Lookup Adjustment Layer.
- Fill it with any color and add a mask.
- Now select the “blade” layer with CMD-A (make sure the layer is visible) and copy it (CMD-C).
- Option/Alt-click the mask thumbnail of the Color Fill Adjustment Layer and Paste-in-Place (CMD-Shift-V).
If you now turn off the blade layer and click on the background layer you should have a result like below:
Next, we’ll blur this Color Fill layer and make three copies:
- Right click the Color Fill layer and choose Convert to Smart Object.
- Choose Filter > Blur > Gaussian Blur and set it to 5 pixels and click OK.
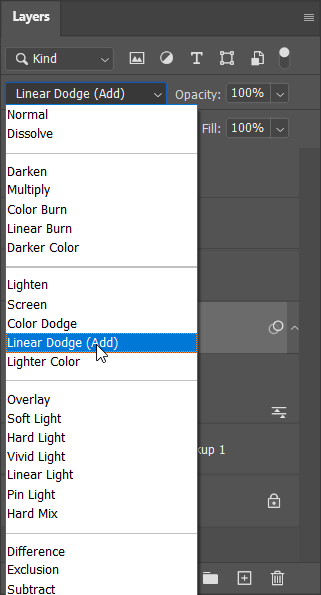
- Set the Blend Mode to Linear Dodge (Add) (see example on the right).
- Now make three copies of this layer (3x CMD-J).
- Double click the Gaussian Blur of each copy and set increasing values, for example 15-40-100.
- Select all Color Fill layers and group them (CMD-G).
To be able to control the color of the glow, we’re going to create an Adjustment Layer that only affects the group below it, but nothing else further down:
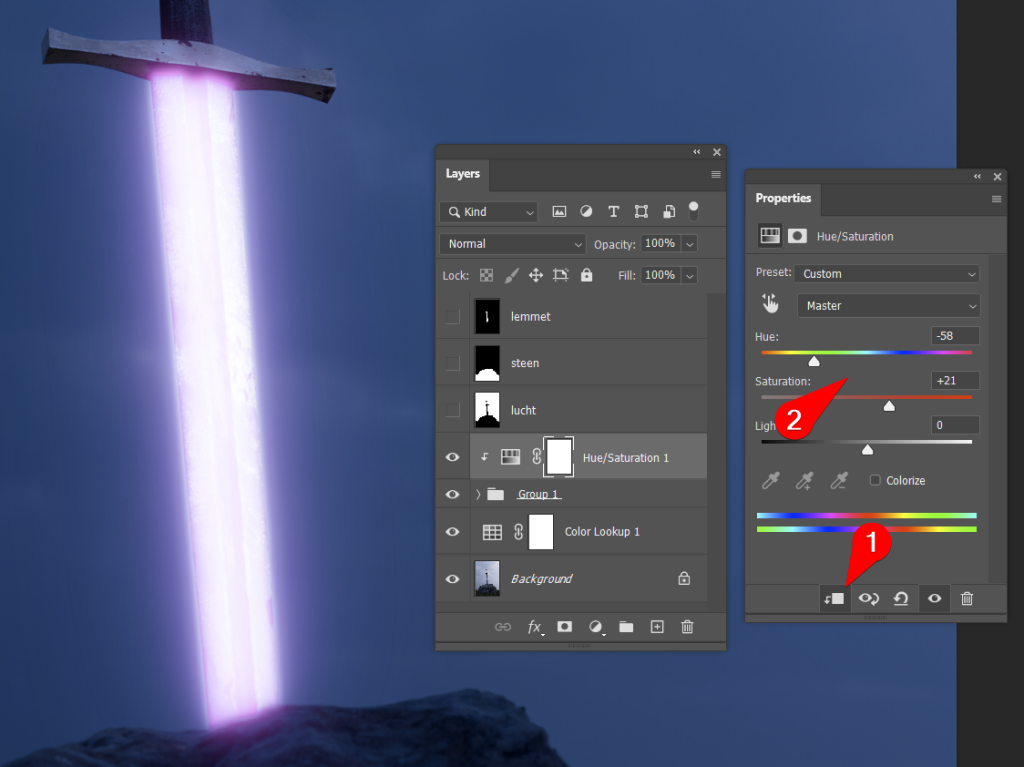
- Add a Hue/Saturation Adjustment Layer above the group and select it.
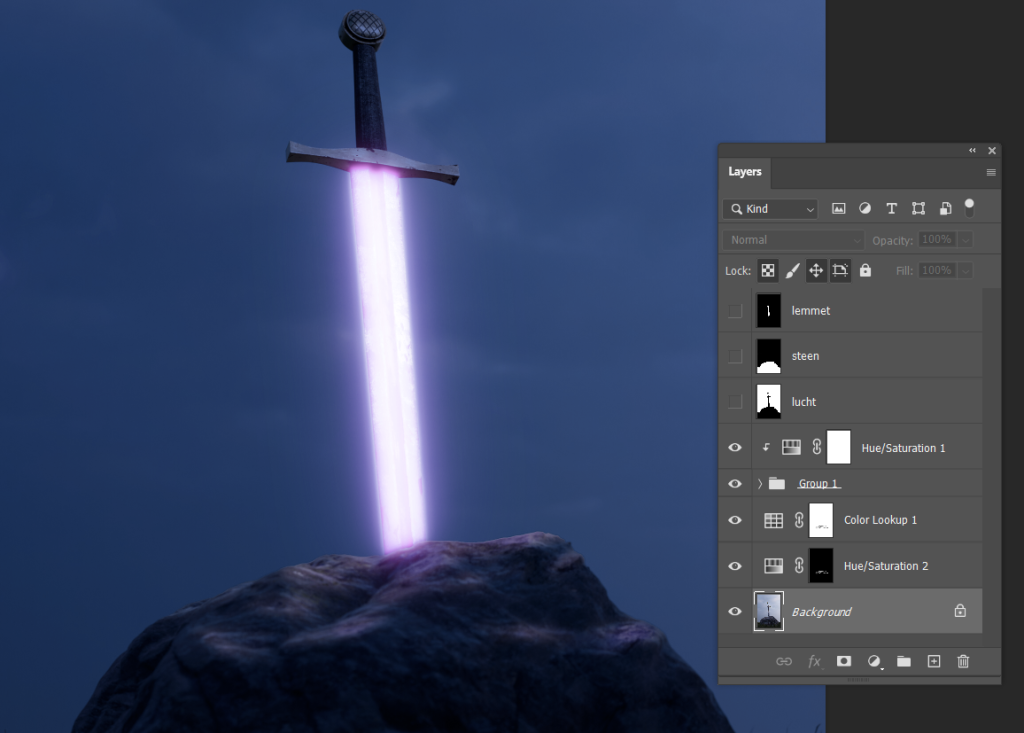
- Open the Properties panel and click on the icon at the bottom left (Clip to Layer below). See (1) in the example below. As a result, this layer only affects the layer below, in this case a group.
- Use the sliders to select the desired color (2).
Now we need to create the light that shines from the sword onto the rock. To be able to draw this light in at the top edge of the stone, without drawing over the sky, we need a selection of the stone:
- Select the “stone” layer (and make it visible).
- Select all pixels (CMD-A) and copy them (CMD-C).
- Now create a new layer and add a mask to it.
- Option/Alt click the mask and Paste-in-Place (CMD-Shift-V).
- Hold down CMD (CTRL on PC) and click on the mask thumbnail. This will give you a selection based on the black and white (and gray!) values of the mask.
- Now delete this layer with right click > Delete Layer.
- Now is a good time to save the selection: Select > Save Selection. Name it “stone”. We don’t necessarily need the selection anymore, but it’s good practice to keep it.
- Now click CMD-H. This makes the dotted line of the selection disappear, but the selection is still active!
So we now have an active selection (which we don’t see) to be able to draw inside. We will draw onto the mask of the Color Lookup Layer, because masking the make-it-night effect will bring back the original daylight! The active selection restricts our brush to the surface of the stone.
- Select the mask of the Color Lookup Table.
- Now click Select a small, soft brush of about 50 pixels. Set the flow to 10 and draw with Black.
- Now draw the light on the rock with small strips. Place on feeling, look closely at the shape and think about where the light would fall. Build up the strips on top of each other: they add up to more and more light.
- When you’re ready, use levels (CMD-L) to fine-tune the light in brightness.
- Don’t forget to make the selection visible again (CMD-H) and turn it off (CMD-D).
To be able to control the color of the light cast on the rocks, we’ll use an adjustment layer. We’ll mask this with a copy of the mask of the Color Lookup layer.
- Place a Hue/Saturation Adjustment Layer above the background layer.
- Hold down Option/Alt and drag the mask thumbnail from the Color Lookup layer onto this Hue/Saturation layer and release. This copies the mask to this layer.
- Invert the contrast in the mask with CMD-I.
- Now select the layer thumbnail and adjust the sliders of the Hue/Saturation Adjustment Layer to match the color of the blade.
You should have something similar to the following:
This part of the exercise is not yet finished!
This step is optional. Finally, we’re going to replace the background and give the light a texture.
- Search and apply flare online
- Search and apply online background
This part of the exercise is not yet finished!

