The Paintbrush Tool is one of the oldest tools next to the Pen Tool. The Pen Tool works with Bézier curves, which gives tight curves, but doesn’t look like drawing by hand. The Paintbrush is more like drawing in that respect: the line simply follows the brush tip. There are different types of brushes that you can design yourself. In this lesson we will look at the so-called Art Brush.
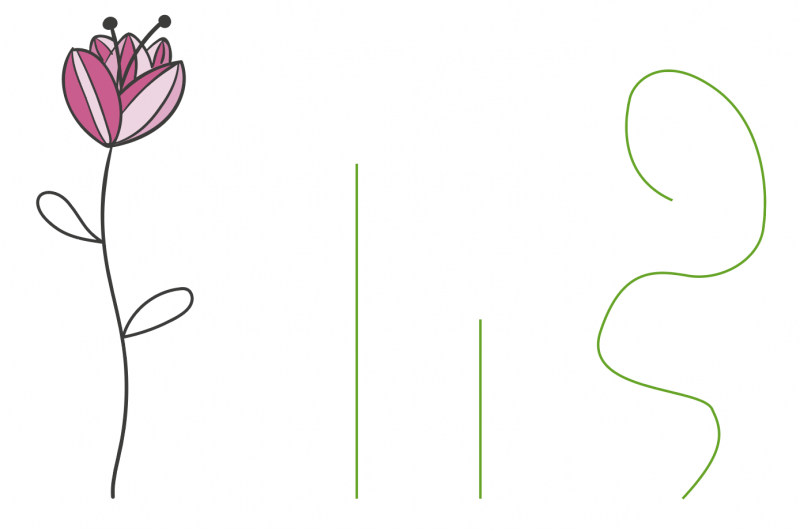
An Art Brush should be imagined as a vector image that you load into the Brush and with which you draw. The image is then smeared in the drawing direction. Below you see on the left a picture of a flower, and three ‘normal’ lines (strokes).
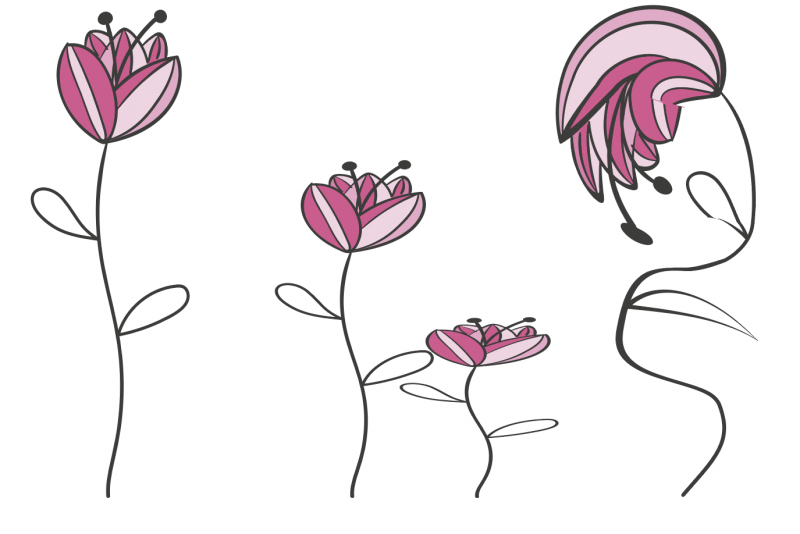
When we make an Art Brush of the image and apply it to the lines, you can clearly see how an Art Brush stretches (or contracts) the image, depending on the length of the stroke.
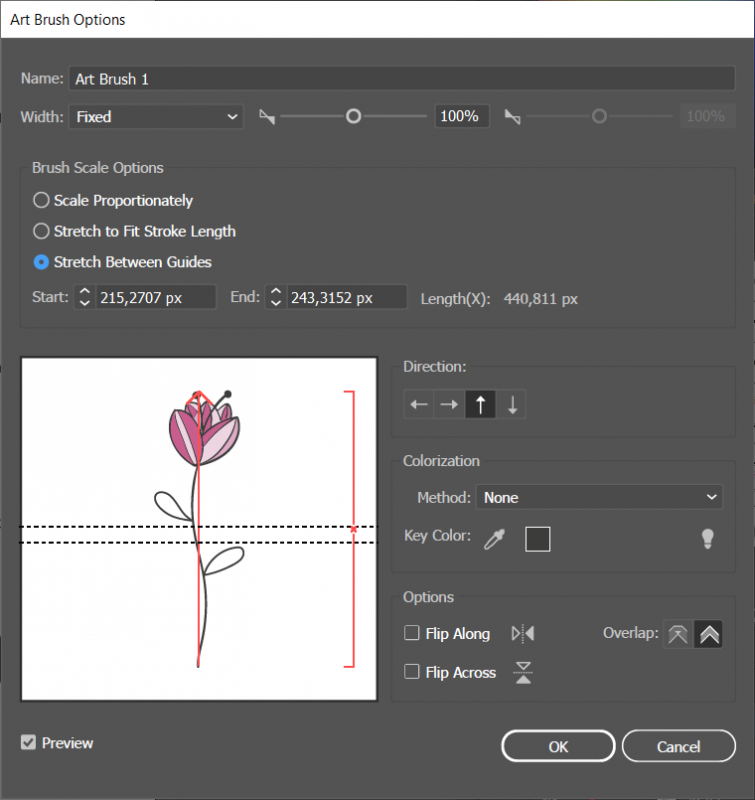
Below you can see the Art Brush Options of the flower brush used.
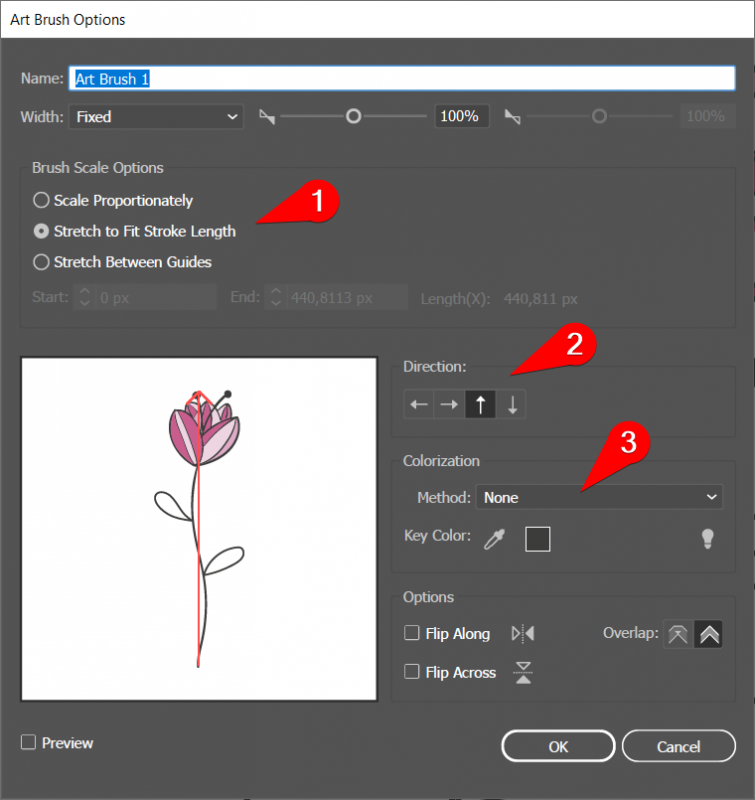
At (1) you see that the picture must be stretched to the length of the stroke. The Scale Proportionally option makes the image shrink or stretch in length and width. The option ‘Stretch between guides’ is explained below.
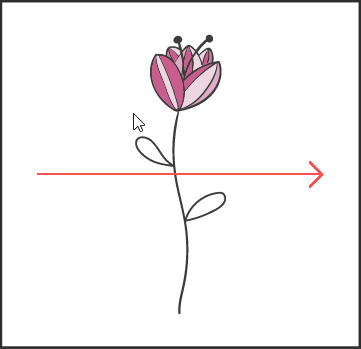
At (2) you choose the direction in which you want to smear the image, from the start point to the end point of a line (you will also see this red arrow in the thumbnail). In the case above, the line starts at the stem and ends at the petals. Suppose you let the arrow go from left to right as in the picture on the right, then a line would start with the left leaf and end with the right leaf.
At (3) you choose what to do with the colors. With “None” you keep the colors out of the original image. With “Tints” the whole image is colored with the stroke color. The other two options “Tints and Shades” and “Hue Shift” are variations of the current stroke color.
Stretch Between Guides
When you choose this option, you can let the stretching take place between two lines. You can drag these lines over the preview to place them as you want. With the setting below you see that only the piece of stem between the two leaves is stretched.
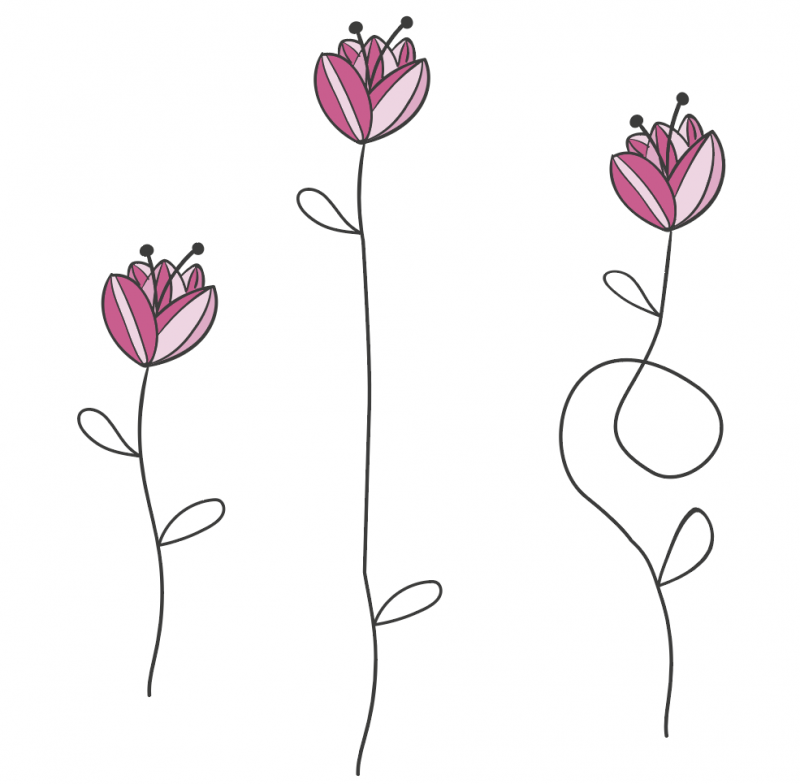
Below you can see the result. The original flower used to create the Art Brush is on the left. The middle and right flower are longer. You can see that the stretching is now only happening on the piece of stem between the leaves.
You make an Art Brush by dragging a selection of one or more shapes into the Brushes Panel. Alternatively you can select New > Art Brush from the Brushes Panel’s context menu with an active selection.
You can use a brush by selecting the Brush Tool and then selecting a Brush from the Brushes Panel (by clicking it). Now draw on the artboard and you see a line appear. Illustrator will only render the brushstroke after you’ve released the mouse button.
Double-click an Art Brush to open its options. If you make any changes and save these, Illustrator creates a second brush (with the changes) in the Brushes Panel. If you get asked if you want to apply this brush to an active selection, choose No.
- Download the Training Art Brushes and open it in Illustrator.
- Do Exercises 1 and 2.